Saturday, May 8, 2010

A few new mods

A couple of new mods I have done. I picked up a Tiburon tail fin in while I was back in the USA. Had it painted there along with my gauge cover, door handle covers and seat belt retractors.
Also grabbed a chrome fuel lid and the Roadster Race Exaust.


Caliper paint again


Just 3 months ago I decided to be different and paint my calipers yellow and red. I liked the way they looked but cleaning them got old. Japanese caliper paint is crap and a pain to clean. It never just washes away or comes off. Instead you have to repaint always to keep them nice.
So yesterday I painted my calipers and shields all yellow. I think it looks much better. However, I'm sure the paint won't last long. Time to import some G2 from the USA.

Tuesday, February 2, 2010

New carpet and rubber heal pads for floormats

We are using a new thicker carpet and a stronger rubber heal pad when making floor mats for customers. The carpet is very soft and feels great! The new heal pad is a thicker rubber with small spikes for better grip and should prevent any holes.

Photobucket
Photobucket


And remember, Blaze Customs is the only website that allows you to fully customize your new floor mats exactly how you want them! With any color trim, text and font style! Check, www.blazecustoms.com for more info and pictures.

Updated Video Section of my Website

I have recently updated the Videos section of my website. Now you can find numerous videos all about the NC MX-5 such as exaust clips, MX-5 Cup Races, body kits and more videos of my car. Pretty much anything MX-5 related will be posted there and new videos will be added all the time! Check, www.blazecustoms.com and click on videos. Enjoy!

New GoPro HD Video Camera

Wow! I haven't updated my blog since Christmas. Sorry guys, I have been very busy with my job, working on floor mats and painting car parts.
Anyways, I had someone messing around with my car at night. I would wake up in the morning only to find rocks, dirt and my exaust tips bent. So I bought a GoPro Motorsports cam and set it up to film at night. Haven't caught anyone yet, but other car alarms often go off early morning.
Not only is this a great security cam for when ever I park my car. It is also great to use while driving to catch other bad drivers or to get some cool video at different angles. I took some videos for ya guys. I forsure will be getting many new cool vids in the future. In the videos my piano dash trim is removed, thats because I been busy painting it!


You can click on the videos and watch them on Youtube in a larger higher quality.

Wednesday, December 23, 2009

My Christmas Present

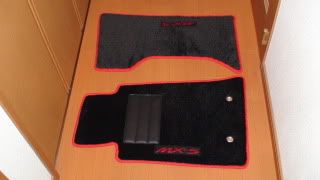
As my Christmas present my wife totally surprised me with a brand new MX-5 red jacket she made herself. I had ordered one a few months ago from a certain website and the quality was just crap. Not to mention when I washed it the colors all faded though the site claimed it could be washed with no problems. The site I ordered from also claimed they were located in the USA, but the package came from Asia. UGH!
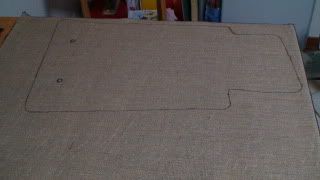
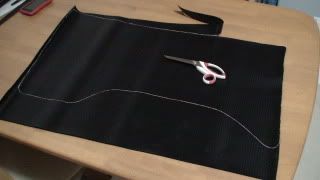
She knew the style I liked, so she actually found a kit with full plans and diagrams on how to make rally jackets just like you see on Ebay or some websites. (Seems all companies use the same exact plans, or just order the jackets from a supplier in Asia, they use very crappy cheap materials and charge alot)
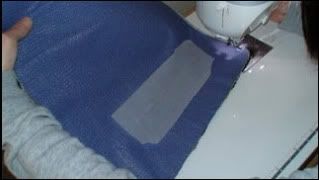
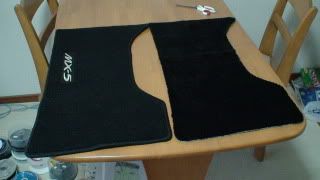
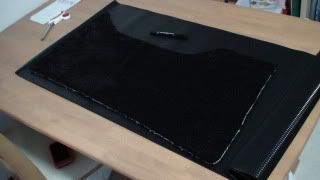
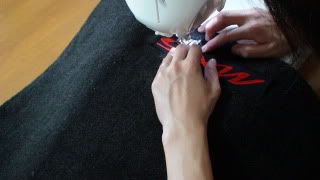
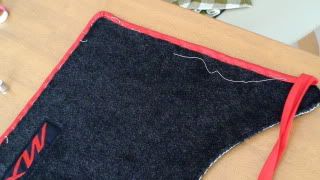
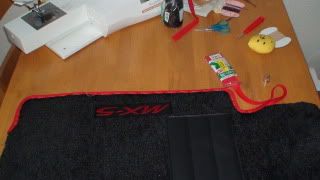
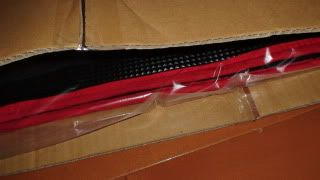
She used a soft REAL micro fiber material and a silky like liner on the inside. She then used the sewing machine I bought her to embroider all logos and text. Her kit came with the software to make Mazda and MX-5 logos.
She did such a professional job that it makes the other one I bought look like a child made it. I am very happy and she even stuck my company name and website on it!
I asked her, was it hard to make? Her reply.. I'm a pro!
We forsure will be selling these on our website to give MX-5 drivers a QUALITY jacket and not some crap that will fall apart.


Monday, November 30, 2009

More LED's

Sunday I woke up and installed some more LED's on my car. I love my DAMD bumper and wanted to make it glow at night. I installed five 6in LED tubes inside the bumper. Took me all day and was a pain in the butt to do the wiring. I wanted it all perfect so you can't even tell I have LED's until they are on!

Here are the results!


Saturday, October 17, 2009

Got a new rear bumper

Well, after our little accident at Mt. Aso "which you can read about below" Mazda replaced my rear bumper and I got the car back a few days ago! This is the third time I have had the bumper replaced because some moron rear ended me!
Now my car is pretty much like new! Back in May I had my very bad accident where a car literally pushed me off the road and I crashed into a telephone pole. The front end was totally destroyed but Mazda fixed it all up for me and even installed my DAMD front bumper and grille.
So the front bumper, front head lights, hood, windshield, dash, steering wheel, glove box, seat belts and now the rear bumper and tail lights are all brand new! WOO HOO!


Photobucket
So Friday morning I woke up, poured some coffee and walked out onto my balcony. Over the mountains was a rainbow which looked pretty cool. The sun was trying to come out and I knew it would be a great day.

At 10:00am we drove the Demio "Mazda 2" rental car to our dealer. My wife also has a 2009 Demio, it's a good little car.
We picked up my Roadster, of course the new back bumper looked great!

So the first thing I did once I drove it back home was slap the DAMD emblem on the black trim in the center of the bumper.
Photobucket
Photobucket


I also stuck a Shell Helix sticker over a scratch on my dash. "Not sure how that got there" And a Shell V-Power sticker on the plastic piece near the windshield on the drivers side.
Photobucket
Photobucket
Photobucket

I was even more excited because my wife sewed me some brand new floor mats with our new rubber backing.
Photobucket
Photobucket
I liked my old mats she made, but these looked better and are stronger.


The car was all washed and waxed, looked very shiny so I snapped some good pictures.
Photobucket
Photobucket
Photobucket
Photobucket
Photobucket
Photobucket
Photobucket

After I was done taking some nice pictures, I had to drive to work. I must drive to Omuta city, which takes about an hour and thirty minutes from where I live.
Once I get near Omuta there is a nice toll road I take that has a cool bridge. I filmed myself driving over it because it looks cool. The scenery in that area is also kinda nice.


That night when I got home I installed some more LED's inside my car. Then my wife and I thought it might be fun to cruise around in Knight Rider mode!
"Blaze, we need turbo boost!"


So now with all my LED's installed this is what the car looks like at night.

I know this is over the top, but I usually only use these LED's at car shows around my area. Some people have neon kits or LED's under their cars as well, but only in one solid color, "blue or green" Mine can change to over 3 million colors and patterns so it really stands out. Sometimes during the night I drive with the white LED's on so I can be noticed better by other cars. And at times just to show off I use Knight Rider mode which is all red with the scanner going.

Newly Designed Floor Mats

On my website, http://www.blazecustoms.com/ I have had many orders for our custom floor mats lately. My wife and I just finished 6 orders! I have also recieved many emails about how they are made and why I raised the price. Well, one reason for the price raise is because the Japanese Yen is stronger than the US dollar. We were actually losing money making floor mats for customers. "In all honesty after buying the supplies, making the mats and then shipping them we lost more than we gained" Another reason is because I have changed the design to make the mats stronger and look better. With the amount of work we put into these for each customer, we could charge much, much more. But because of shipping prices to other countries we don't.

Our original floor mat design used a very thin rubber backing,


Though it worked, I felt this backing just wasn't strong enough and didn't look good. So I went looking for something stronger and a bit thicker. The problem was it couldn't be to thick or my wife couldn't sew through it.
Photobucket
I found this at a local shop, it is a thicker black rubber which can be used in trunks or cut to be a weather proof floor mat. It was just the right thickness and even had small spikes on the back to hold the mats in place. PERFECT!


Now we had to make the floor mats for our customers.


How they are made:


Each mat is traced onto a large piece of carpet. We trace around an original factory standard mat to get exact measurements. Our carpet is much softer than the original and also easier to clean.


After the mat is traced it is then cut out, the result is a mat the exact same size as the factory standard.


Then the mat is placed on our rubber backing and traced.


Once done the rubber is then cut out.


Then it's off to our sewing machine to have the text of your choice embroiderd and sewn on the mat. Our high-tech sewing machine can embroider any kinda text style and color you like!

Photobucket
Once that's finished the heal pad is sewn on. Our heal pad helps prevent a hole being put through the mat. The original US factory standard mats didn't come with a heal pad, the Japanese standard did.


Then it is time for the new rubber backing to be sewn on. This must be done by hand because it is thicker. Our sewing machine needle may break if we use it.


Once the rubber is sewn on we can then start on the trim. This must be done by hand and is the hardest part. My wife must stick the needle through the carpet and the rubber! This process takes her a full day or more for each mat.


Now we are almost done, we poke holes into the mat and install the eyelits.
These keep the drivers side mat in place.


Some velcro is put around the edges to help hold the mat to the floor even more.


Now we are finally done! And that's all the work that goes into making "you" the customers custom floor mats. Here are some close up pictures.


We make sure the customers new mats are well packed for shipping.

Both mats are placed in a large plastic bag and stuck between 2 pieces of cardboard. Then put inside a large paper bag and sealed. This way the mats are flat, and not bended. Once the customer recieves his/her mats they can be satisfied knowing they now have Japanese hand made custom floor mats!